Thursday, May 8, 2014

buy UR flip flops now

You need to start looking for UR new flip flops in all those cute discount stores. I am talking about Ross, Marshalls and T J Max. You will need to get some supplies from your craft closet.


You can also can do a 4th of July theme with them and don't forget to save a few short curly ribbons, to attached to a safety pin so when you tie up your new red, white and blue shirt you can attach some curly ribbons to the tie. I used a clip to attach to this shirt shown, however, you can use the safety pin idea (attach it once, it washes really good)


Ok on with the flips. Cut your ribbon to about a yard or so, I measure ribbon by running the ribbon from my nose to the end of my arm, to my figure tips. As my best friend says she has a short arm so she adds more ribbon to that measurement.

Next check the ribbon to determine what side is the front. The ribbon I choose doesn't require to any further inspection, this fabulous purple ribbon is 1 1/2 wide, however, I did buy some gold ribbon that was 2 1/2" wide, this width didn't make a good flower for these shoes, so I turned it into a flower for your hair or to fit it on a hat. I like the 1 1/2" wide.

Hold the ribbon facing you, making a mental note of, what would you like to be the top and the bottom of the flower. On the top edge, hold the wire on both ends of the ribbon, start to gather the ribbon towards the center, (NOTE don't let the wire slip past the end of the ribbon, it is impossible to regather the ribbon).


Saturday, May 3, 2014

Memorial Day t-shirt or 4th of July check it out

I have made several t-shirts for the 4th of july or a cute shirt to wear all summer long.

You will need to get a T-shirt, I like the fruit of the loom shirt, it comes in a V-neck style. I made a cute shirt last year with a Fruit-loom shirt that was a v-neck with a side pocket. I dressed up the pocket with cotton eye-let lace and some cute navy/blue ribbon with pok-a-dots printed on the ribbon. I cute the sleeves, and hummed the sleeve edges with a quick hand stitch. I used the extra t-fabric to tie up the sides of the side to make a fitted shirt..

see my pic's of the shirt.


I wear this shirt at least every time I can, wash it every week. So here is what you need to gather up to make a shirt for this summer. I have picked a Fruit of the Loom shirt that is blue and white striped so I can add some red ribbon to make it a 4th of July shirt or I think I can't wait for the 4th so it will be for Memorial day.

Since I couldn't find a Men's t-shirt w/V-neck and a side pocket, I just brought a v-neck and going to add a pocket myself. So I brought some ribbon that is red with white pok-a-dots and red & white checked. (need to prewash the ribbon, since ribbon shrinks up). You can pass this step up with a shirt with a pocket on it, either Men's or some of those wonderful Women's shirts out there on the market. (Walmart has some really cute ones) I like the Men's so I can cute off the sleeves for matching fabric for a tie. But since we are going to use ribbon, that will work for a tie up on the waist.

So go out and get a shirt, this idea could work for gifts for UR BFF or sister, Mother or kids.
I have posted 2 pic's of the shirt in progress, will up date with photos with the work on going.
stay tuned.


Post notes.......don't forget your ribbon that UR going to curl so you can make hair ribbons and/or saftey pin ribbons for UR new shirt. See the pic on my easter shirt, think red, white & blue.

Tuesday, April 29, 2014

new ideas for Boutique items $ to make

Check out the discount stores, Ross, T J max or Marshall's 4 some cute flip flops. You can sell them at your Church Bazaar or Craft meet. Check out my pic's.


Ok on with the flips. Cut your ribbon to about a yard or so, I measure ribbon by running the ribbon from my nose to the end of my arm, to my figure tips. As my best friend says she has a short arm so she adds more ribbon to that measurement.

Next check the ribbon to determine what side is the front. The ribbon I choose doesn't require to any further inspection, this fabulous purple ribbon is 1 1/2 wide, however, I did buy some gold ribbon that was 2 1/2" wide, this width didn't make a good flower for these shoes, so I turned it into a flower for your hair or to fit it on a hat. I like the 1 1/2" wide.

Hold the ribbon facing you, making a mental note of, what would you like to be the top and the bottom of the flower. On the top edge, hold the wire on both ends of the ribbon, start to gather the ribbon towards the center, (NOTE don't let the wire slip past the end of the ribbon, it is impossible to regather the ribbon).


Now roll the ribbon from one end to the other placing the wire down in the center of the flower, you will need the wire later, DON'T CUT IT OFF AT THIS POINT. The ribbon should start to look like a flower.

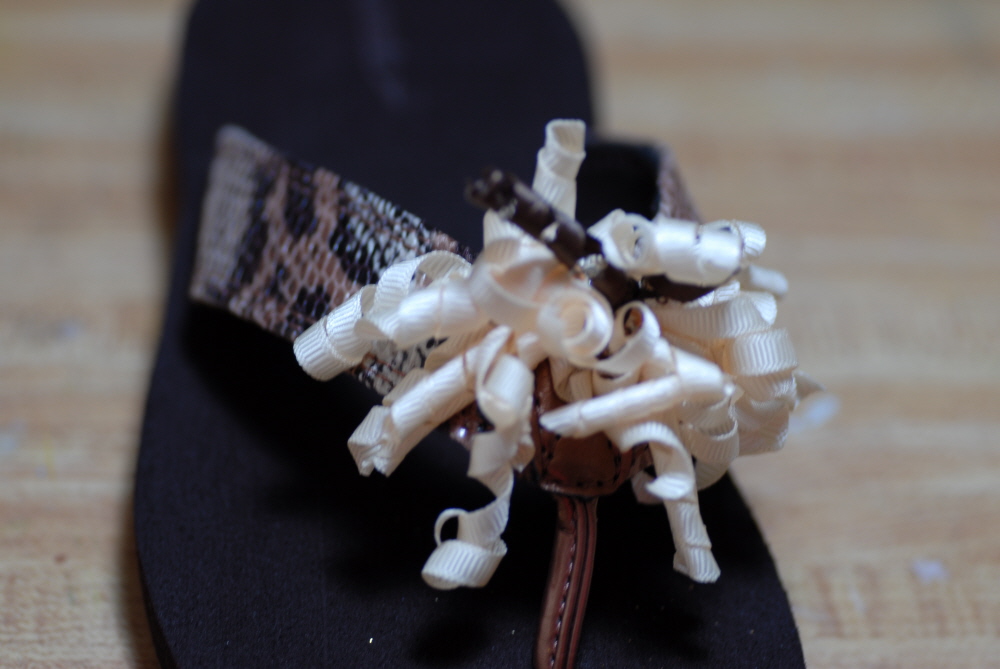
You can now thread your wire through a needle and run the wire through the flower and draw the wire up tight so the gathering is held in place. I like to put an "X" in the bottom of the flower. (hide the ends of the ribbon within the flower, you can tuck the outer end of the ribbon under the flower and you have a flower for your flip.

Since your flip at the toe junction is made out of fabric you can thread your needle again... wire your flower to the toe junction or you can hot glue it to the toe. I found some pink heart glams and hot glued them to the center of the flower, and put some cute hearts on the size of the flips. Oh of course I cut off the remainin

Mother's day gifts

Mother's day is coming up fast. Think about some flowers or a plant? Spend time with her, what about all your BFF's. Whatever you do, I don't think anything to do with cooking will do it.

What about curling ribbons, You have lots of those curly ribbons laying around the craftroom. Do some red, white and blue hair clips. Memorial day is only a few weeks away. Maybe you could use the hair clip as a ribbon accents on a gift bag. Gift cards are always very good.

I know what about making some new flip flops, with ribbons attached with a red, white and blue theme.


Sunday, April 27, 2014

Mother's Day gifts

planning to making something for Mom?

What about BFF flowers, something that will last will past the week of a floral design?


Do you like the pic's? I simply love this whole idea, it is something you can do for your Bff's that are mothers and you want to do something to show your love for their friendship.

The sunflower doesn't particularity look entirely real. But some ladies really like sunflowers on their desk or around the house? Perhaps you can make the third one in is theme, to charm up your desk? I really can't say enough about babys breath, to me it seems like it adds so much to to the entire flower vase. You don't need to have the stem of the baby breath touch the bottom of the vase. I have just placed them inside the vase, since it just seems to fill in the vase, and you may want to change it out from time to time.

I need to give out a rule of thumb for doing up the bud vases. Measure your vase, for example 12 inches, you should note the top of the entire vase should be no taller than 24". That would include the ting-ting, filler, baby breath and the rose.
What I am saying is the total vase shouldn't be any taller than 24 inches(if your vase is 12 inches tall). It is very easy to go over board with ting-ting. You need to think of the proportions of the item you are making. I also want to note right now..... I put a bend in the rose stem near the top. Do you think every rose is perfectly straight?

When you cut your rose use those side cutters, and you will need to bend the stem to get the darn thing to cut through the stem, but please save the bottom half of the stem. You can use it for hot glueing some wispy filler. They always come in handy for those little extras you may need for the next project or to cut up some of the filler so your bud vase doesn't look to much filler (you may not see the rose, it is the main focus of the vase).

Ok now we are ready to add the resin. Cut off the top of your 10 or 12 oz water bottle. pour equal amounts of both resins into the bottle. (you can practice with one vase so mix up a third of each bottle, but you will need to use up the entire contents very soon, within days). You will need to stir the two together, not like you are making a cake or beating up egg whites. You need to stir so you do not make bubbles, remember when you had to blend in egg whites into angle food cake mixes? You have your vase empty with the exception of the rocks or crystals. Pour your resin mixture slowly down the center of the vase, don't get any resin on the side of the vase. fill to the level you think water looks good. You don't need even to cover the rocks. Think real what you have seen in bub vases sitting on your desk. Watch out for bubbles? Do you see bubbles in a real bud vase?

Then reassemble your flowers in the vase, I like to put the rose in first. Load up the filler and ting-ting. Finish up with adding the baby's breath and wiring the ribbon bow on the the rose stem or you can use a plastic card holder if you brought one from your florist. Do you have a card to attach to the plastic thing. Put thank you or with lots of love. Do something silly?


Lets add up the cost of this project

rose (2) @ 3.95 = 7.90
Vases (3)@ 1.00 = 3.00
rocks & crystals @ 1.00 = 2.00
baby breath 2.50 = 2.50
filler (found in craft closet)= .00
resin water 12.99 minus 40% = 7.80 (used a 40% coupon @ Jo ANN'S)
ribbon = 1.00
total 24.20 divide by 3 = 8.07

I think that makes a very good gift price.

Sunday, March 30, 2014

Curly ribbons 4 U to save money

Just in case you didn't know I have given the recipe to making curly ribbons, in an earlier post. Check out my picture right next to this post? I have a picture of Christmas ribbons in my hair. They make excellent gifts or ribbon on a gift bag ( but make sure they know it is a hair clip so put a hang tag on the clip, stating check me out!!) Here are some pic's of the blog.


Check out the flower that is an excellent gift for a BFF. It is a fake one. I came back from a Walmart Super store and found another good set of Fake roses and a white carnation. Have attached some pic's from that post. Go Girlfriend with some really great gifts for this wonderful giving season.

Boutique ideas for School

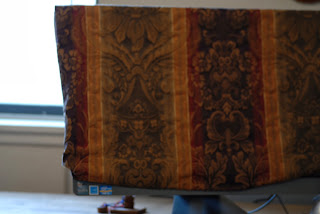
Covers for computers, sewing machine, or any other thing that needs to be dust protected.


It is that time of the year for schools to ask for you to add to their budget, in the way of Spring Boutiques. I remember when I was asked to donate $50.00 or a boutique items worth $50.00. I would think the bill has gone up to at the very least $75.00. Of course, if you didn't bring something in then you were charged the money on your total tab, for the year. So I brought something in, and have helped many a friend to make something.

What about this idea.............machine covers, for just about everything. Everyone has a computer sitting around, whether you are using it or not. Most everybody is using their iPhone or cell phone as a cute little computer.
Kindle could use a nice carrying case of fabric, just like a book cover? Since I like touching paper on the book, or audiobooks, I couldn't tell if this is a good idea.

Gather up these items...
l. sewing machine...easy straight stitch sewing. Maybe granny can do this one for you.
2. left over fabric, or clear plastic yardage.
3. thread to match the item
4. measure the item etc sewing machine, computer or printer.
5. Then cut to your measurements adding an inch for seams/bottom for ease taking on & off computer screen. Sew the sides... ViolÁ
money made.

Check out my pic's, I have a window that is open everyday in the spring and summer, so I really need a cover for my screen, all that dust is blowing in from the window. Can't afford to buy a new screen.




If to much work 4 U, then my ever favorite is BFF vase
.


I need to give out a rule of thumb for doing up the bud vases. Measure your vase, for example 12 inches, you should note the top of the entire vase should be no taller than 24". That would include the ting-ting, filler, baby breath and the rose.
What I am saying is the total vase shouldn't be any taller than 24 inches(if your vase is 12 inches tall). It is very easy to go over board with ting-ting. You need to think of the proportions of the item you are making. I also want to note right now..... I put a bend in the rose stem near the top. Do you think every rose is perfectly straight?

When you cut your rose use those side cutters, and you will need to bend the stem to get the darn thing to cut through the stem, but please save the bottom half of the stem. You can use it for hot glueing some wispy filler. They always come in handy for those little extras you may need for the next project or to cut up some of the filler so your bud vase doesn't look to much filler (you may not see the rose, it is the main focus of the vase).

Ok now we are ready to add the resin. Cut off the top of your 10 or 12 oz water bottle. pour equal amounts of both resins into the bottle. (you can practice with one vase so mix up a third of each bottle, but you will need to use up the entire contents very soon, within days). You will need to stir the two together, not like you are making a cake or beating up egg whites. You need to stir so you do not make bubbles, remember when you had to blend in egg whites into angle food cake mixes? You have your vase empty with the exception of the rocks or crystals. Pour your resin mixture slowly down the center of the vase, don't get any resin on the side of the vase. fill to the level you think water looks good. You don't need even to cover the rocks. Think real what you have seen in bub vases sitting on your desk. Watch out for bubbles? Do you see bubbles in a real bud vase?

Then reassemble your flowers in the vase, I like to put the rose in first. Load up the filler and ting-ting. Finish up with adding the baby's breath and wiring the ribbon bow on the the rose stem or you can use a plastic card holder if you brought one from your florist. Do you have a card to attach to the plastic thing. Put thank you or with lots of love. Do something silly?


Lets add up the cost of this project

rose (2) @ 3.95 7.90
Vases (3)@ 1.00 3.00
rocks & crystals @ 1.00 2.00
baby breath 2.50 2.50
filler (found in craft closet) .00
resin water 12.99 minus 40% 7.80 (used a 40% coupon @ Jo ANN'S)
ribbon 1.00
total 24.20 divide by 3 8.07

I think that makes a very good gift price.
Thursday, March 27, 2014

Bunnies Aprons R Easy to make

I went to Jo Ann's and found lots of cute items to dress up my Pre-made store brought aprons.


I stenciled some cute purple bunnies on the front of the aprons. Found some garland with bunnies and eggs on it. I glued the eggs & Bunnies under the stenciled bunnies. I like to glam it up.


I tinker'd around with the aprons and put some felt decorated easter eggs in place of the foo bunnies /eggs. They look really fun on the apron. Remember I can't cook very good so I really set a very good looking table and look the glamourous part with a good looking apron.


I then put together a bunch of curly ribbons, purple and lavender, wrapped them with wire, placed them on a safety pin.
check it out. I was able to pin it to my apron or pin it to a tee shirt.


Check out my post regarding an Easter tee or spring tee, for you in the cooler parts of the USA, a nice sweatshirt is the ticket.

Friday, March 21, 2014

Bunnies t-shirt 4 u and BFF

Are you looking for something special to wear prior to Easter to the office or shopping? You could use this idea for an easter breakfast apron (see my blog) or pack a new shirt into a easter basket.

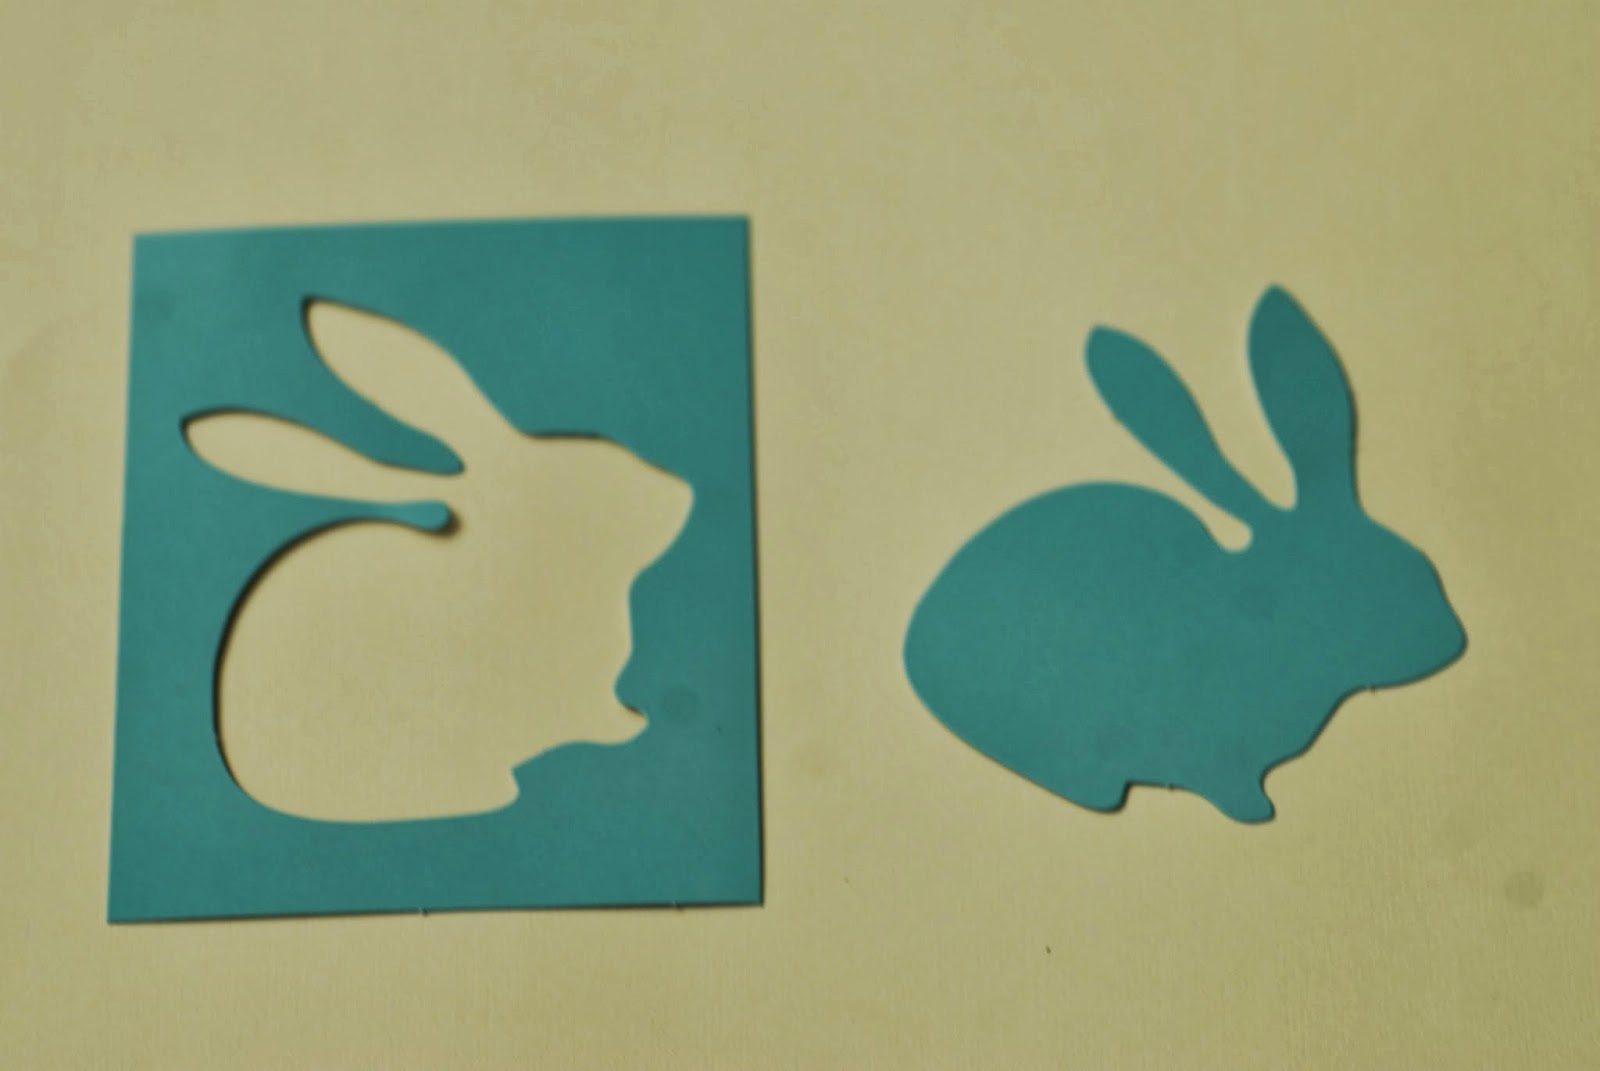
Check out these pic of a t-shirt I am making? You will need either a sweatshirt (they are gone from the stores in So Cal) or a colored T-shirt. I choose a purple on from my close, will need to gather another one from my stash in the ever famous crafting closet. So you will need to gather up the following items.

1. A shirt of some kind.

2. Fabric paint of your choice, I chose purple folk art fabric Metallic plum, I added some gold glitter on top of the
stencils, I was using (will finish up and take a pic of the shirt)
I added pic of the stencil I used and an additional large wooden Easter egg I will use for another shirt.

3. Look for some cute sparkly easter egg foils that you can stick on to you shirt also, I used some felt decorator eggs.

4. I made a curly ribbons, by wrapping purple & lavender curly's and wrapped the extra wire around a safety pin, so I could attach the ribbons to the tie to make a fitted tee at the waist. See the pic.


Saturday, March 15, 2014

Bunnies 4 spring

Well, I have gotten up and going on Windows8, this computer stuff is tough. I have had problems with getting photos on line, but here are some on my ideas for a spring (or Easter basket/shirt items).


I have make lots of these cute bunnies, as pins, clips and could be used as easter basket fillers, or put on a florist plastic card holder.

Check out the pic's! I have included a pattern for the bunny, note the measurements I have put on the picture. All you need to do is print the picture and copy it in UR printer enlarging it to the size I have on the picture, about 4 1/2 inches. You can make it bigger or smaller.


These bunnies are made out of canvas or muslin fabric (or go wild and pick out some pink sheeting or whatever, is in UR mind will see the vision). Here is what you will need to make alot of bunnies.

1. 1/4 yd of some kind of fabric for the body of the bunny
2. Use your craft wire for the ears.
3. I like to draw the face with pens. (Micron01 #1 arhival ink found in the scrapbook section)
4. Pink fabric paint, Blue for the nose.
5. Sewing machine to sew the sides together.
6. Clothes pins clip style, or pin back for making her into a pin.
7. Small piece of scrap fabric for a bow tie.

go gather up these items and I will be working on the directions for the cutie.


To get started you need to enlarge or decrease the pattern, I have measured my bunny, as 5x4" when this bunny is finished. You are going to stuff the darn thing to bring it to life. As you can see I put a ruler next to the pattern so you could gauge the size. I would measure the protractor right next to the pattern to see if you got it to the right size. What the heck it could be any size.

Cut out the bunny. Cut 2 the front and the back.

Cut a slit in one of the patterns,(this will be the back. needed for stuffing and putting in the craft wires for the ears).

On the front side mark the face features,(remember the cuter the eyes with expression the better) so use the recommended pen) Paint the inside of the nose pink, blush in the cheeks and ears with a light effect just like blusher on your face. Dot the center eyes with black pen and then add a small white dot for highlight with a fabric paint that comes with a pointy tip (I used the Tulip PUFFY paint, if puts just the right dot. Practice with a scrape piece of fabric.

Sew the two pieces together (this the face showing ----this is a raw edges showing, easy plseee). Insert the wiring in the ears, you can cut to size if you want, or bend the wire in one ear and then go on to the next ear. You now stuff the face of the bunny, only slightly, these would make it a soft look.

Sew up the back with small stitches, or you could glue it up also, whatever, you do best. ADD a cute bow under the chin. Voilá a cute bunny, add the clothes pin or a pin back.
Look at how cute and cleaver you are.