Friday, October 10, 2014

Are U ready 4 Halloween with your Holliday Wreath?

Did you check out UR old Wreaths?

 What about a pot of mums 4 the front porch?
 I put out a ceramic pumpkin, I painted orange.  I use it for 2 months by showing the Halloween side and then turning it around to a Thanksgiving accent after Halloween.
We don't have a lot of trick or treater, but a lot of broken pumpkin in the street, so I put away mine for the night and then put everything back on the porch ready to show my Thanksgiving display.

Are they a bit tried looking? Get out there and buy some small quick fix's. The Dollar store has some great new Fall ideas to make quick fit 4 UR door or porch to made a wonderful display.

I have updated my Wreath by adding something shiny and a witch's hat to my wreath, what could you use to update a old wreath?


a

Tuesday, July 1, 2014

4TH of July quick shirt

It's here, the 4th of July. You can make a tee shirt, buy one of those cute $5.00 special screen print shirts. Bass Pro shop had some really cute ones in their print ad.
last week for the famous $5.00 price.

You will need some fabric paint, glitter and maybe some sequin. If you don't have colors in Red, White and Blue. Go to your local craft store. Get whatever tickles your fance.


Pre wash the shirt & dry i in the dryer making it ready to wear. Put some aluminum foil behind the the section of shirt you want to put paint on. (this will protect the back side of the shirt). Cardboard will work very good for this purpose, you can buy a cardboard paint board are available to purchase at the craft store, if you plan to do this type of craft idea later, say for Halloween or Christmas.

Already to go for it......Put paint on the screen print, say red sparkle fabric paint on the red portion of the shirt, outline the red portion of the shirt. At this time you could also put some sequins, what ever you like. Then you can paint other parts of the design on the shirt. You are basically coloring inside the lines of the shirt print.

Remember you are making this shirt to sparkle and shine on the 4Th of July.
Let the paint dry, don't wash the shirt 4 several days, whatever, the maker of the paint suggest.

Go enjoy the 4th and stay safe.

Monday, June 16, 2014

Don't forget BFF roses

Make a perfect gift for any BFF.

Do you have a work associates, church, good friends or a favor you need to repay? This is the perfect gift for any of these situations.

To make this item... the very first item is a rose or flower that looks real (really gives you that thought the flower is living and breathing). If it is not looking truly living real, then this gift is not for you.


Years ago, I found a good looking flower at a floral supply house, see the pic, it is not very enduring...it is a funky color. At the time it was a very popular color. So you ask who cares? Here is my story, listen carefully and hopefully you will learn from it........

I worked in a large office and I always pass by a cube held by a manager, on her desk was a beautiful rose in a cut glass crystal vase. I thought she had a standing order with a florist, because this rose always looked fabulous. Water in the vase and never a faded bloom. Sometimes I would stop in the office to check out the flower, especially when the manager had gone on vacation. She let me sit in for her. The darn thing was not real. Thank you Brenda for having this rose in your office.

The moral to this story is if you want to be the envy of your office or have given the best gift to your BFF, get the best flower. Always pick a color that will not go out of season. Brenda's rose was soft pink, I think it was her signature color.

Having looked at all the craft store around here, I found a large section of roses at Hobby Lobby, so I went with soft pink. You can go wrong with that color.

If you don't find the right type of flower than is a waste of time. Jo Ann's had some flowers, but they didn't have roses. It is up to you.

Next installment is the vase, and filler. Flower first than the rest, oh, by the way, you will need to buy 3 flowers, since the resin you will be using for fake water is mixed as a one time process, and it will make 2 or 3 vases of fake water. Go with the 3 or just make one and throw out the rest of the resin.

ello once again, I have done my shopping and got to the last step of this project.

this is the final run though, I have put everything I think will go with the bud vase. Check out the picture.

I got some baby breath from Vons florist this morning and I got two sprigs of it for $2.50. This is more than enough for 3 three bud vases. I did get some resin water from Jo Ann's. I found that the manufacture of this
stuff, has a made another type of resin. This type is cooked on the stove in boiling water, you pour the stuff into your vase then have to heat it again to get the bubbles out of the water. I went with the $12.99 type that is still mixed together, stirred together and then poured down the middle of the vase.

I have a picture above that is empty vase to show you the vase next to it, has rocks in the bottom. I think I like the river rocks..look better than the crystal drops. Check out the above pictures to see the difference. Looking again
I think I also tend to go for the hot pink ribbon rather that the pink polk-a-dot ribbon. What do you think?

I have arranged the vases the way I wanted it, to look, prior to pouring the resin water. You will need to take all the items out of the vase with the exception of the rocks.

Here is a list of the items used in the vase...
rose, curly willow (2 twigs) 2 ting-ting, several filler stuff (the green filly stuff), baby breath 2-branches, small gauge ribbon

Please note I really like the baby breath, it makes the whole thing look so professional, it gives it a soft look.
I know I can hear you saying, they will die? Yes, they die and dry very well turn a bit yellow or ivory color.
If this one is for you, I would think about every 6 months you could spring for a new bit of baby's breath, to freshen it up. Tomorrow, will do the resin. You will need to gather up a used drinking water bottle, wooden popsicle stick.
The water bottle is the type you drink from at your desk. You are going to cut the top off so you can mix the resin in the bottle, stirring with the popsicle sticks or a bamboo skewers.

Saturday, June 7, 2014

Button Doll Hats 4 U to make 4 UR BFF or Birthday gifts


Here is my button doll prior to getting her new hat. I same to find myself using cups, plates or glasses to get a good circle rather than using a compass. I have found a glass measuring 3 1/2 inches but liked a drinking glass that measures 3 3/4 inches. So I circled the glass and cut out the darn thing out of interfacing. I tried using a quarter (the 25 cents thing) for a place for its head to fit though the center. I found that size to small so I cut the hole a bit bigger. See the pic. Check it out to see if you like the way it fits, does it cover the face? Or does it fall down past the face.


If it doesn't fit don't use it, start over. Now if you are doing a hat for a larger doll, start with brown paper or card stock and wrap a piece of string to measure to little cuties head. This will be your judge of the size of the plate you will use to make your circle for a hat. Use the string to measure the center of the hat to gauge the hole needed to fit the dolly head.


I cut three circles for the top, middle, and the underside of the hat. If you have matching fabric that is great but if not go with plain fabric that blends with the dolls dress. I used white felt for the bottom, interfacing and black quilting fabric. I glued the three together with white glue, but it didn't glue very well, so I hot glued the thing together. I cut around the outside so the three pieces match. I also ran around a black marker to cover up the white interfacing in the middle. Now is the fun stuff. I twisted up the front of the hat and started adding all the stuff that makes the hat interesting.

Button Doll Hats 4 U to make

I have been making button doll hats as part of on going prototype development to have the cutest button dolls. It seems like in my office there was about 2 to 3 button dollies on more than several ladies desk. They were sold at most of the charity boutiques. I would go and buy straw doll hats at the craft store, but this would not work very well, since the straw insides of the hat would catch on the dollies fake hair. So this has been like chasing a crazy thought to improve on making my button dolls look more glamour.

These hats will fit any doll, Do you have an American Girl doll? Well, these instructions or directions will fix just about any sized doll.


Stay tuned ...bookmark me. Working on the directions.

You will need interfacing for crafting, for button dolls, I brought 1/4 of yard. This is the very crafty stuff, it is titled as crafting, something that is out this time of the year, since you can make halloween masks.
Pick out a quilting fat quarters in the color of the hat you want to make. I brought some felt that was glittery.

ok, off to take some pic's for you ...I like to add feathers to the whole thing, so you could check those out in your tip to a craft store or fabric store. Let your mind wonder at what you would like to see in a doll hat. Buttons?
Left over scrapbooking small items? Jump out of the box with ideas.

Thursday, May 8, 2014

buy UR flip flops now

You need to start looking for UR new flip flops in all those cute discount stores. I am talking about Ross, Marshalls and T J Max. You will need to get some supplies from your craft closet.


You can also can do a 4th of July theme with them and don't forget to save a few short curly ribbons, to attached to a safety pin so when you tie up your new red, white and blue shirt you can attach some curly ribbons to the tie. I used a clip to attach to this shirt shown, however, you can use the safety pin idea (attach it once, it washes really good)


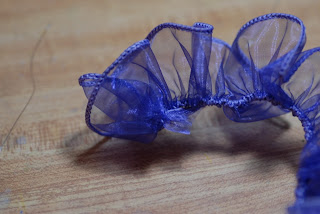
Ok on with the flips. Cut your ribbon to about a yard or so, I measure ribbon by running the ribbon from my nose to the end of my arm, to my figure tips. As my best friend says she has a short arm so she adds more ribbon to that measurement.

Next check the ribbon to determine what side is the front. The ribbon I choose doesn't require to any further inspection, this fabulous purple ribbon is 1 1/2 wide, however, I did buy some gold ribbon that was 2 1/2" wide, this width didn't make a good flower for these shoes, so I turned it into a flower for your hair or to fit it on a hat. I like the 1 1/2" wide.

Hold the ribbon facing you, making a mental note of, what would you like to be the top and the bottom of the flower. On the top edge, hold the wire on both ends of the ribbon, start to gather the ribbon towards the center, (NOTE don't let the wire slip past the end of the ribbon, it is impossible to regather the ribbon).


Saturday, May 3, 2014

Memorial Day t-shirt or 4th of July check it out

I have made several t-shirts for the 4th of july or a cute shirt to wear all summer long.

You will need to get a T-shirt, I like the fruit of the loom shirt, it comes in a V-neck style. I made a cute shirt last year with a Fruit-loom shirt that was a v-neck with a side pocket. I dressed up the pocket with cotton eye-let lace and some cute navy/blue ribbon with pok-a-dots printed on the ribbon. I cute the sleeves, and hummed the sleeve edges with a quick hand stitch. I used the extra t-fabric to tie up the sides of the side to make a fitted shirt..

see my pic's of the shirt.


I wear this shirt at least every time I can, wash it every week. So here is what you need to gather up to make a shirt for this summer. I have picked a Fruit of the Loom shirt that is blue and white striped so I can add some red ribbon to make it a 4th of July shirt or I think I can't wait for the 4th so it will be for Memorial day.

Since I couldn't find a Men's t-shirt w/V-neck and a side pocket, I just brought a v-neck and going to add a pocket myself. So I brought some ribbon that is red with white pok-a-dots and red & white checked. (need to prewash the ribbon, since ribbon shrinks up). You can pass this step up with a shirt with a pocket on it, either Men's or some of those wonderful Women's shirts out there on the market. (Walmart has some really cute ones) I like the Men's so I can cute off the sleeves for matching fabric for a tie. But since we are going to use ribbon, that will work for a tie up on the waist.

So go out and get a shirt, this idea could work for gifts for UR BFF or sister, Mother or kids.
I have posted 2 pic's of the shirt in progress, will up date with photos with the work on going.
stay tuned.


Post notes.......don't forget your ribbon that UR going to curl so you can make hair ribbons and/or saftey pin ribbons for UR new shirt. See the pic on my easter shirt, think red, white & blue.

Tuesday, April 29, 2014

new ideas for Boutique items $ to make

Check out the discount stores, Ross, T J max or Marshall's 4 some cute flip flops. You can sell them at your Church Bazaar or Craft meet. Check out my pic's.


Ok on with the flips. Cut your ribbon to about a yard or so, I measure ribbon by running the ribbon from my nose to the end of my arm, to my figure tips. As my best friend says she has a short arm so she adds more ribbon to that measurement.

Next check the ribbon to determine what side is the front. The ribbon I choose doesn't require to any further inspection, this fabulous purple ribbon is 1 1/2 wide, however, I did buy some gold ribbon that was 2 1/2" wide, this width didn't make a good flower for these shoes, so I turned it into a flower for your hair or to fit it on a hat. I like the 1 1/2" wide.

Hold the ribbon facing you, making a mental note of, what would you like to be the top and the bottom of the flower. On the top edge, hold the wire on both ends of the ribbon, start to gather the ribbon towards the center, (NOTE don't let the wire slip past the end of the ribbon, it is impossible to regather the ribbon).


Now roll the ribbon from one end to the other placing the wire down in the center of the flower, you will need the wire later, DON'T CUT IT OFF AT THIS POINT. The ribbon should start to look like a flower.

You can now thread your wire through a needle and run the wire through the flower and draw the wire up tight so the gathering is held in place. I like to put an "X" in the bottom of the flower. (hide the ends of the ribbon within the flower, you can tuck the outer end of the ribbon under the flower and you have a flower for your flip.

Since your flip at the toe junction is made out of fabric you can thread your needle again... wire your flower to the toe junction or you can hot glue it to the toe. I found some pink heart glams and hot glued them to the center of the flower, and put some cute hearts on the size of the flips. Oh of course I cut off the remainin

Mother's day gifts

Mother's day is coming up fast. Think about some flowers or a plant? Spend time with her, what about all your BFF's. Whatever you do, I don't think anything to do with cooking will do it.

What about curling ribbons, You have lots of those curly ribbons laying around the craftroom. Do some red, white and blue hair clips. Memorial day is only a few weeks away. Maybe you could use the hair clip as a ribbon accents on a gift bag. Gift cards are always very good.

I know what about making some new flip flops, with ribbons attached with a red, white and blue theme.


Sunday, April 27, 2014

Mother's Day gifts

planning to making something for Mom?

What about BFF flowers, something that will last will past the week of a floral design?


Do you like the pic's? I simply love this whole idea, it is something you can do for your Bff's that are mothers and you want to do something to show your love for their friendship.

The sunflower doesn't particularity look entirely real. But some ladies really like sunflowers on their desk or around the house? Perhaps you can make the third one in is theme, to charm up your desk? I really can't say enough about babys breath, to me it seems like it adds so much to to the entire flower vase. You don't need to have the stem of the baby breath touch the bottom of the vase. I have just placed them inside the vase, since it just seems to fill in the vase, and you may want to change it out from time to time.

I need to give out a rule of thumb for doing up the bud vases. Measure your vase, for example 12 inches, you should note the top of the entire vase should be no taller than 24". That would include the ting-ting, filler, baby breath and the rose.
What I am saying is the total vase shouldn't be any taller than 24 inches(if your vase is 12 inches tall). It is very easy to go over board with ting-ting. You need to think of the proportions of the item you are making. I also want to note right now..... I put a bend in the rose stem near the top. Do you think every rose is perfectly straight?

When you cut your rose use those side cutters, and you will need to bend the stem to get the darn thing to cut through the stem, but please save the bottom half of the stem. You can use it for hot glueing some wispy filler. They always come in handy for those little extras you may need for the next project or to cut up some of the filler so your bud vase doesn't look to much filler (you may not see the rose, it is the main focus of the vase).

Ok now we are ready to add the resin. Cut off the top of your 10 or 12 oz water bottle. pour equal amounts of both resins into the bottle. (you can practice with one vase so mix up a third of each bottle, but you will need to use up the entire contents very soon, within days). You will need to stir the two together, not like you are making a cake or beating up egg whites. You need to stir so you do not make bubbles, remember when you had to blend in egg whites into angle food cake mixes? You have your vase empty with the exception of the rocks or crystals. Pour your resin mixture slowly down the center of the vase, don't get any resin on the side of the vase. fill to the level you think water looks good. You don't need even to cover the rocks. Think real what you have seen in bub vases sitting on your desk. Watch out for bubbles? Do you see bubbles in a real bud vase?

Then reassemble your flowers in the vase, I like to put the rose in first. Load up the filler and ting-ting. Finish up with adding the baby's breath and wiring the ribbon bow on the the rose stem or you can use a plastic card holder if you brought one from your florist. Do you have a card to attach to the plastic thing. Put thank you or with lots of love. Do something silly?


Lets add up the cost of this project

rose (2) @ 3.95 = 7.90
Vases (3)@ 1.00 = 3.00
rocks & crystals @ 1.00 = 2.00
baby breath 2.50 = 2.50
filler (found in craft closet)= .00
resin water 12.99 minus 40% = 7.80 (used a 40% coupon @ Jo ANN'S)
ribbon = 1.00
total 24.20 divide by 3 = 8.07

I think that makes a very good gift price.

Sunday, March 30, 2014

Curly ribbons 4 U to save money

Just in case you didn't know I have given the recipe to making curly ribbons, in an earlier post. Check out my picture right next to this post? I have a picture of Christmas ribbons in my hair. They make excellent gifts or ribbon on a gift bag ( but make sure they know it is a hair clip so put a hang tag on the clip, stating check me out!!) Here are some pic's of the blog.


Check out the flower that is an excellent gift for a BFF. It is a fake one. I came back from a Walmart Super store and found another good set of Fake roses and a white carnation. Have attached some pic's from that post. Go Girlfriend with some really great gifts for this wonderful giving season.

Boutique ideas for School

Covers for computers, sewing machine, or any other thing that needs to be dust protected.


It is that time of the year for schools to ask for you to add to their budget, in the way of Spring Boutiques. I remember when I was asked to donate $50.00 or a boutique items worth $50.00. I would think the bill has gone up to at the very least $75.00. Of course, if you didn't bring something in then you were charged the money on your total tab, for the year. So I brought something in, and have helped many a friend to make something.

What about this idea.............machine covers, for just about everything. Everyone has a computer sitting around, whether you are using it or not. Most everybody is using their iPhone or cell phone as a cute little computer.
Kindle could use a nice carrying case of fabric, just like a book cover? Since I like touching paper on the book, or audiobooks, I couldn't tell if this is a good idea.

Gather up these items...
l. sewing machine...easy straight stitch sewing. Maybe granny can do this one for you.
2. left over fabric, or clear plastic yardage.
3. thread to match the item
4. measure the item etc sewing machine, computer or printer.
5. Then cut to your measurements adding an inch for seams/bottom for ease taking on & off computer screen. Sew the sides... ViolÁ
money made.

Check out my pic's, I have a window that is open everyday in the spring and summer, so I really need a cover for my screen, all that dust is blowing in from the window. Can't afford to buy a new screen.


If to much work 4 U, then my ever favorite is BFF vase
.


I need to give out a rule of thumb for doing up the bud vases. Measure your vase, for example 12 inches, you should note the top of the entire vase should be no taller than 24". That would include the ting-ting, filler, baby breath and the rose.
What I am saying is the total vase shouldn't be any taller than 24 inches(if your vase is 12 inches tall). It is very easy to go over board with ting-ting. You need to think of the proportions of the item you are making. I also want to note right now..... I put a bend in the rose stem near the top. Do you think every rose is perfectly straight?

When you cut your rose use those side cutters, and you will need to bend the stem to get the darn thing to cut through the stem, but please save the bottom half of the stem. You can use it for hot glueing some wispy filler. They always come in handy for those little extras you may need for the next project or to cut up some of the filler so your bud vase doesn't look to much filler (you may not see the rose, it is the main focus of the vase).

Ok now we are ready to add the resin. Cut off the top of your 10 or 12 oz water bottle. pour equal amounts of both resins into the bottle. (you can practice with one vase so mix up a third of each bottle, but you will need to use up the entire contents very soon, within days). You will need to stir the two together, not like you are making a cake or beating up egg whites. You need to stir so you do not make bubbles, remember when you had to blend in egg whites into angle food cake mixes? You have your vase empty with the exception of the rocks or crystals. Pour your resin mixture slowly down the center of the vase, don't get any resin on the side of the vase. fill to the level you think water looks good. You don't need even to cover the rocks. Think real what you have seen in bub vases sitting on your desk. Watch out for bubbles? Do you see bubbles in a real bud vase?

Then reassemble your flowers in the vase, I like to put the rose in first. Load up the filler and ting-ting. Finish up with adding the baby's breath and wiring the ribbon bow on the the rose stem or you can use a plastic card holder if you brought one from your florist. Do you have a card to attach to the plastic thing. Put thank you or with lots of love. Do something silly?


Lets add up the cost of this project

rose (2) @ 3.95 7.90
Vases (3)@ 1.00 3.00
rocks & crystals @ 1.00 2.00
baby breath 2.50 2.50
filler (found in craft closet) .00
resin water 12.99 minus 40% 7.80 (used a 40% coupon @ Jo ANN'S)
ribbon 1.00
total 24.20 divide by 3 8.07

I think that makes a very good gift price.